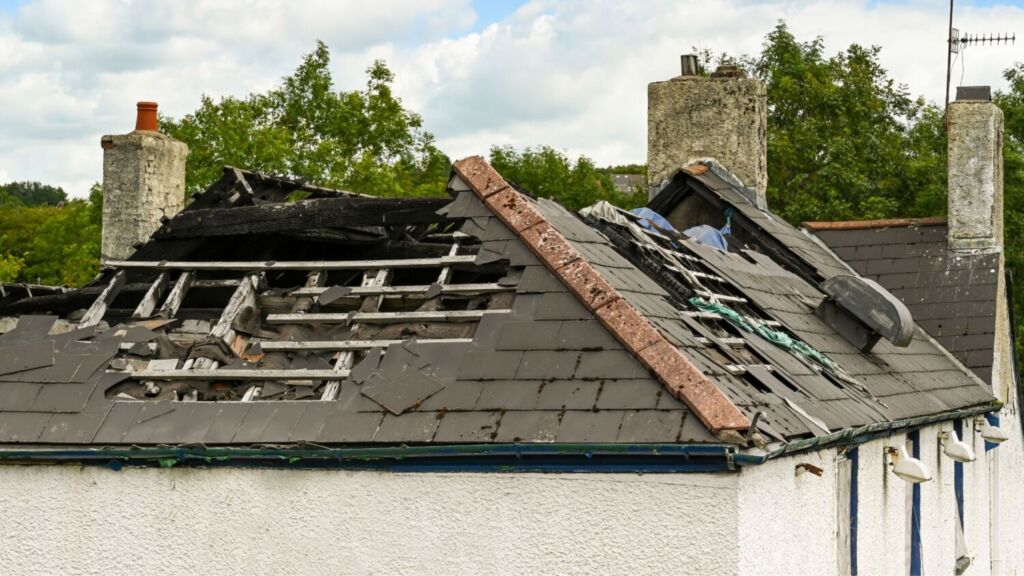
Storms can be unpredictable, and when they strike, your roof often takes the brunt of the damage. Whether it’s high winds, hail, or heavy rain, roof damage can occur in various ways, from missing shingles to leaks and structural issues. If you’ve recently experienced a storm and suspect your roof has been affected, it’s essential to act quickly and carefully to minimise further damage.
Here’s a step-by-step guide on how to handle roof damage after a storm, including hiring roofers north wales:
1. Assess the Situation Safely
First and foremost, your safety comes first. If the storm has just passed and you’re thinking about inspecting your roof, be cautious. Storms can cause structural damage to your roof and the surrounding area, so don’t attempt to inspect your roof if you’re unsure about your safety. Wait until the weather has settled and conditions are safe.
If you feel comfortable doing so and it’s safe, you can conduct a visual inspection from the ground. Look for:
- Missing or damaged shingles
- Sagging sections of the roof
- Fallen branches or debris
- Visible leaks or water stains on the ceiling
If you notice anything concerning, it’s time to take the next steps.
2. Document the Damage
Before making any repairs, document the damage for insurance purposes. Take clear photos and videos of any visible damage to your roof, siding, gutters, or any other areas affected by the storm. Include wide-angle shots that capture the entire roof and close-ups of specific damage points. This documentation will be essential when filing a claim with your insurance provider.
Be sure to record the date and time the storm occurred, as this can help corroborate your claim.
3. Temporary Fixes to Prevent Further Damage
While waiting for professional help or insurance assistance, it’s important to minimize further damage. Temporary fixes can help prevent water from entering your home and causing more significant damage to your ceilings, walls, and belongings.
- Tarp the Roof: If your roof is leaking or has holes, use a large tarp to cover the affected areas. Secure it tightly with nails, staples, or heavy-duty rope to ensure it stays in place.
- Seal Small Leaks: If the damage is small and accessible, you can use roofing tar or sealant to patch small leaks temporarily. This can help buy you time until permanent repairs can be made.
- Move Valuables: If water is leaking into your home, move any valuables out of harm’s way to prevent further damage to your belongings.
4. Contact Your Insurance Provider
Once you’ve assessed the damage and made temporary repairs, it’s time to contact your homeowner’s insurance provider. Roof damage caused by storms is typically covered under standard homeowner’s policies, but it’s important to confirm with your insurance company the exact details of your coverage.
When you call your insurance provider:
- Provide them with all the documentation (photos, videos, notes).
- Ask about the process for filing a claim and what documentation is required.
- Inquire about whether they cover emergency repairs, and if so, how to proceed with getting those done.
- Find out how long it will take for an adjuster to come out and assess the damage.
5. Call a Professional Roofing Contractor
Once you’ve contacted your insurance provider and filed your claim, it’s time to call in a professional roofer. A certified roofing contractor will have the experience and expertise to assess the full extent of the damage, which might not always be visible from the ground.
Roofing contractors will conduct a thorough inspection to:
- Check for hidden leaks or structural damage
- Inspect the attic for signs of water damage
- Assess the overall integrity of the roof
- Provide an estimate for the cost of repairs or replacement
If your roof is severely damaged and needs a full replacement, they’ll walk you through the process and help you understand your options.
6. Review Repair and Replacement Options
After the contractor has assessed the damage, you’ll receive an estimate for the repair or replacement costs. Depending on the severity of the storm damage, you may need to choose between repairing the roof or replacing it entirely.
- Repairs: If the damage is relatively minor, your contractor may be able to patch the roof, replace a few shingles, or fix small leaks.
- Replacement: If the storm caused widespread damage or if your roof is nearing the end of its lifespan, a full replacement might be necessary. It’s essential to weigh the costs of repair versus replacement, taking into account the age of your roof and how much longer it can be expected to last.
7. File Your Insurance Claim and Pay Your Deductible
Once you have received an estimate from the roofer, it’s time to submit the claim to your insurance company. They will review the documentation and send out an adjuster to assess the damage. In many cases, they’ll approve the repairs or replacement based on their findings.
Remember, you’ll likely be responsible for paying your deductible, which is the amount you’ll need to pay out of pocket before your insurance covers the rest of the repair or replacement costs. Be sure to confirm the deductible amount with your insurer.
8. Finalise the Repairs and Keep Records
Once your insurance claim is processed and your repairs are complete, make sure to keep all records, including:
- The final invoice from the contractor
- Any payments made to the contractor
- Insurance correspondence and settlement information
These records can come in handy if you need to file another claim in the future or if you plan to sell your home and need proof of roof repairs.
Conclusion
Roof damage after a storm can be overwhelming, but following these steps can help you stay organised and reduce stress. Start by assessing the damage safely, documenting it for insurance purposes, and taking temporary measures to prevent further harm. Don’t forget to involve your insurance provider and a professional roofer to handle the repairs properly. With prompt action and the right help, you can restore your roof and protect your home from future storms.